How to Winterize an RV: A Step-by-Step Guide to Prevent Cold-Weather Damage

Winterizing your RV helps protect its plumbing, water heater, tanks, batteries, appliances, seals, and interior during freezing temperatures and extended storage.
Even a small amount of water left inside a plumbing line can freeze, expand, and damage fittings, valves, pumps, faucets, or the water heater. Proper winterization reduces the risk of expensive repairs and helps make spring de-winterization easier.
The direct answer: To winterize an RV, drain the fresh-water and holding-tank systems, empty and bypass the water heater, remove water from the plumbing lines, add non-toxic RV antifreeze when required, protect the batteries, inspect the roof and exterior seals, and prepare the interior for storage.
Because RV plumbing systems and manufacturer requirements vary, always review the owner’s manual before beginning.
Why Does an RV Need to Be Winterized?
RV plumbing systems contain pipes, fittings, valves, pumps, faucets, tanks, and appliances that can retain water after normal use.
When temperatures drop below freezing, trapped water can expand and cause:
Cracked pipes or fittings
Damaged faucets and shower components
Broken water-pump parts
Toilet-valve damage
Water-heater damage
Leaking connections
Split filter housings
Costly water damage after the system is refilled
Winterization also provides an opportunity to inspect the RV for roof concerns, deteriorating seals, battery problems, pests, moisture, and other maintenance needs before storage.
When Should You Winterize Your RV?
Winterize your RV before sustained freezing temperatures arrive or before placing it into cold-weather storage.
You may need to winterize when:
Overnight temperatures are expected to fall below freezing
The RV will be unused during winter
The RV is stored outdoors or in an unheated facility
You are leaving a cold-weather region for an extended period
The plumbing system will not remain continuously heated
A sudden freeze is forecast before your next trip
Do not rely only on daytime temperatures. Plumbing lines and components can remain exposed to colder overnight conditions, especially underneath the RV or inside exterior compartments.
Before You Begin: Check Your RV’s Requirements
Winterization procedures differ between:
Motorhomes
Travel trailers
Fifth wheels
Toy haulers
Truck campers
Pop-up campers
Differences may include:
Water-heater design
Plumbing layout
Tank locations
Low-point drains
Filter systems
Ice makers
Washing machines
Outdoor kitchens
On-demand water heaters
Hydronic heating systems
Review the manufacturer’s manual and identify all water-using components before starting.
What Supplies Are Commonly Needed?
Depending on your RV and chosen winterization method, you may need:
Non-toxic RV and marine antifreeze
Water-heater bypass kit, if not already installed
Water-pump converter kit or intake tube
Basic hand tools
Drain-pan or bucket
Water-heater plug or anode-rod tools
Air-compressor adapter, when using the compressed-air method
Low-pressure air compressor
Replacement drain plugs or anode rod, if needed
Towels
Flashlight
Manufacturer instructions
Important Safety Note
Use only non-toxic antifreeze designed for RV and marine potable-water systems.
Do not use automotive antifreeze in an RV’s freshwater plumbing system. Automotive antifreeze is toxic and is not designed for potable-water lines.
How to Winterize an RV Step by Step
1. Turn Off the Water Heater
Before draining the plumbing system:
Turn off the propane supply to the water heater
Turn off the electric heating element
Disconnect shore power when appropriate
Allow the water to cool
Confirm that the system is not under pressure
Hot water can cause serious burns. Never remove a water-heater drain plug or anode rod while the tank is hot or pressurized.
2. Disconnect the Water Supply
Disconnect the RV from:
City-water connections
External hoses
Water-pressure regulators
Filters attached to the inlet
Store hoses only after they are drained and dry.
If the RV has an onboard fresh-water tank, turn off the water pump until you are ready to drain or winterize the plumbing system.
3. Drain the Fresh-Water Tank
Locate and open the fresh-water tank drain.
Allow the tank to empty completely. The exact drain location varies by RV.
After draining:
Close the valve according to the winterization procedure
Inspect the drain fitting for cracks or leaks
Confirm that no debris is obstructing the valve
Fresh-water tanks do not always drain perfectly level, so follow the manufacturer’s storage instructions.
4. Empty and Flush the Holding Tanks
Empty the black-water tank first, followed by the gray-water tank.
This sequence allows gray water to help rinse the sewer hose after the black tank is emptied.
Recommended steps include:
Connect the sewer hose securely.
Empty the black-water tank.
Flush the black tank when the RV has an approved flushing system.
Close the black-tank valve.
Empty the gray-water tank.
Rinse and drain the sewer hose.
Close all waste valves.
Store the hose safely.
Use appropriate protective equipment and follow campground, dump-station, and local sanitation requirements.
Do not leave holding-tank valves open during storage.
5. Drain the Water Heater
Once the water heater is cool and depressurized:
Open a hot-water faucet to relieve pressure
Locate the exterior water-heater access panel
Remove the drain plug or anode rod, depending on the model
Open the pressure-relief valve only when appropriate and safe
Allow the tank to drain
Inspect the drain plug, threads, and anode rod
Flush sediment when recommended by the manufacturer
Why must the water heater be drained?
A traditional RV water heater may hold several gallons of water. If that water freezes, it can damage the tank and related components.
Important
Do not turn on the water heater after it has been drained. Operating an empty water heater can damage the unit.
6. Bypass the Water Heater
After draining the water heater, place the bypass valves into the winterization position.
The bypass prevents RV antifreeze from filling the entire water-heater tank. Without the bypass, several extra gallons of antifreeze may be required.
Typical configurations include:
One-valve bypass
Two-valve bypass
Three-valve bypass
Valve layouts differ. Follow the labels or the manufacturer’s diagram rather than relying on a generic arrangement.
If you are unsure which valves to turn, stop and consult an RV technician.
7. Remove or Bypass Water Filters
Remove inline water filters and filter cartridges when required.
Water trapped inside a filter housing can freeze and cause cracks.
Depending on the RV, you may need to:
Remove the filter cartridge
Drain the filter housing
Install a bypass plate
Replace the housing securely
Store the filter according to the manufacturer’s directions
Remember to check filters located beneath sinks, in exterior compartments, or near the city-water inlet.
8. Open the Low-Point Drains
Most RVs have low-point drains for the hot- and cold-water lines.
Locate and open them, then open the faucets to help the lines drain.
Check:
Kitchen faucet
Bathroom faucet
Shower
Exterior shower
Toilet
Outdoor kitchen
Washer connections
Any secondary sink or fixture
Allow the system time to drain.
Afterward, close the drains according to the method you will use for the remaining winterization process.
Two Common RV Winterization Methods
After draining the system, RV owners typically use one of two approaches:
RV antifreeze method
Compressed-air method
Some manufacturers recommend a combination of both.
The correct approach depends on the RV, climate, plumbing design, appliances, and manufacturer instructions.
Method 1: Winterizing With RV Antifreeze
9. Connect the Water Pump to the Antifreeze Supply
Many RVs have a winterization valve and intake tube near the water pump.
The general process may involve:
Turning the valve to the winterization position
Placing the intake tube into a container of RV antifreeze
Confirming that the fresh-water tank is bypassed
Turning on the water pump
Do not pour antifreeze into the fresh-water tank unless the manufacturer specifically instructs you to do so. Using the pump’s intake line is usually more efficient and may simplify spring flushing.
10. Run Antifreeze Through Each Fixture
Starting with the fixture farthest from the pump, open one side of each faucet at a time until RV antifreeze appears.
Follow a consistent sequence:
Cold side of the kitchen faucet
Hot side of the kitchen faucet
Cold side of the bathroom faucet
Hot side of the bathroom faucet
Shower
Exterior shower
Toilet
Outdoor kitchen fixtures
Other water-using components
Allow the antifreeze to run until the color is steady and no clear water remains.
Do not forget:
Toilet sprayers
Exterior wash stations
Low-point drain areas
Refrigerator water lines
Ice makers
Washing machines
Dishwasher systems
Tank-flush connections
On-demand water-heater procedures
Special appliances may require separate manufacturer-directed steps.
11. Protect the Toilet and Traps
Flush the toilet until antifreeze enters the bowl and valve area.
Then pour an appropriate amount of RV antifreeze into:
Kitchen sink drain
Bathroom sink drain
Shower drain
Toilet bowl
This helps protect the P-traps and seals.
Do not overfill fixtures, and follow the antifreeze manufacturer’s directions.
12. Turn Off the Water Pump
Once antifreeze has reached all required fixtures:
Turn off the water pump
Release system pressure
Confirm faucets are positioned according to manufacturer guidance
Return valves to their recommended storage positions
Label the system as winterized
Placing a visible reminder near the water-heater switch can help prevent someone from turning it on while empty.
Method 2: Winterizing With Compressed Air
Some RV owners remove water from plumbing lines using low-pressure compressed air.
This method generally involves:
Draining the tanks and water heater
Bypassing the water heater
Connecting a blowout adapter to the city-water inlet
Using regulated, low-pressure air
Opening fixtures one at a time
Blowing water from each line
Protecting drains and traps with RV antifreeze
Use Caution
Excessive air pressure can damage RV plumbing components.
Never connect an unregulated high-pressure air source directly to the RV. Follow the RV manufacturer’s maximum pressure instructions.
Compressed air may not remove every pocket of water from complex plumbing systems. Appliances, pumps, valves, traps, and specialty components may still require additional protection.
When uncertain, professional winterization is the safer option.
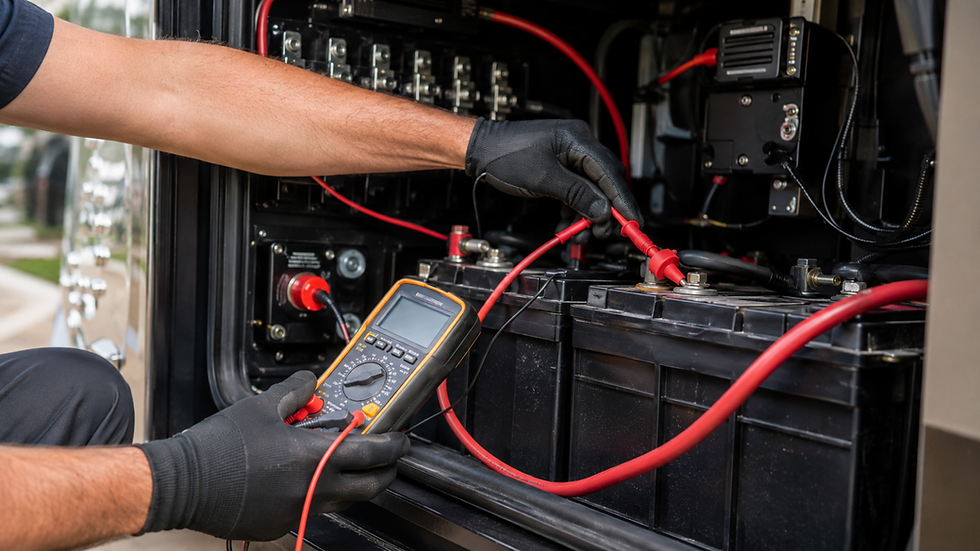
13. Protect the RV Batteries
Battery care depends on battery type, storage temperature, charging equipment, and manufacturer recommendations.
General steps may include:
Fully charging the battery
Inspecting for corrosion or damage
Cleaning terminals
Checking electrolyte levels in serviceable flooded batteries
Disconnecting parasitic loads
Using an appropriate battery maintainer
Removing the battery when recommended
Storing it in a safe, ventilated location
Checking its charge periodically
A battery left partially discharged can deteriorate during storage.
Lithium, AGM, gel, and flooded lead-acid batteries have different storage requirements. Follow the battery manufacturer’s instructions.
J&S RV Service includes battery-system installation and repair among its mobile service capabilities.
14. Inspect the Roof and Exterior Seals
Winterization should include an exterior inspection.
Check:
Roof seams
Vent seals
Skylights
Air-conditioner mounting areas
Antennas
Windows
Doors
Corner trim
Utility openings
Slide-out seals
Storage-compartment seals
Look for:
Cracking
Separation
Missing sealant
Soft areas
Discoloration
Loose components
Signs of moisture
Cold weather, snow, ice, and repeated freeze-thaw cycles can worsen existing seal problems.
J&S RV Service offers roof inspections and repair as part of its service list.
15. Prepare the Interior for Storage
A clean, dry interior is less likely to develop odors, moisture problems, or pest activity.
Before storage:
Remove perishable food
Clean the refrigerator and freezer
Leave refrigerator doors slightly open
Empty trash
Clean counters and cabinets
Remove liquids that could freeze
Wash and dry linens
Vacuum floors and upholstery
Inspect for moisture
Close propane valves when appropriate
Remove valuables
Store sensitive electronics safely
Follow manufacturer instructions for blinds and shades
Avoid leaving food, paper goods, pet food, or scented products that may attract pests.
16. Reduce Moisture During Storage
Moisture can contribute to:
Musty odors
Condensation
Mold-like growth
Corrosion
Interior staining
Damage to fabrics and wood products
Helpful steps may include:
Confirming the RV is dry before closing it
Repairing known leaks
Using moisture-control products appropriately
Maintaining airflow when storage conditions allow
Checking the RV periodically
Removing wet items
Inspecting cabinets and corners
Do not rely on moisture absorbers as a substitute for repairing a roof, window, or plumbing leak.
17. Protect the RV From Pests
Inspect common entry points, including:
Plumbing penetrations
Electrical-cable openings
Furnace vents
Refrigerator vents
Storage compartments
Door seals
Slide-out areas
Undercarriage openings
Remove nesting material and seal appropriate gaps using materials approved for the RV application.
Avoid blocking required ventilation openings or appliance exhausts.
Check the RV throughout storage because rodents can damage wiring, insulation, hoses, furniture, and stored belongings.
18. Prepare the Tires and Exterior
Before long-term storage:
Inflate tires to the recommended pressure
Inspect for cracks and damage
Park on a stable surface
Use approved tire supports when needed
Follow manufacturer guidance for leveling
Protect tires from prolonged ultraviolet exposure
Avoid improper lifting or frame support
Secure awnings
Close and seal exterior compartments
Remove debris from the roof
Do not use stabilizer jacks to lift or support the full weight of the RV unless the manufacturer specifically permits it.
19. Record What You Winterized
Create a simple winterization record that includes:
Date completed
Antifreeze method or compressed-air method
Amount of antifreeze used
Water heater drained and bypassed
Filters removed
Battery condition
Roof concerns observed
Repairs still needed
Appliances requiring special spring procedures
Person who performed the service
This record can make de-winterization faster and reduce the chance of overlooking a valve, plug, filter, or appliance.
Common RV Winterization Mistakes
Forgetting the Water Heater
Leaving water inside the tank can lead to freeze damage.
Always drain and bypass the unit according to its manufacturer’s instructions.
Using the Wrong Antifreeze
Automotive antifreeze must not be used in the freshwater plumbing system.
Use only non-toxic RV and marine antifreeze designed for potable-water systems.
Missing an Exterior Fixture
Exterior showers, outdoor kitchens, spray ports, and wash stations are often overlooked.
Forgetting Specialty Appliances
Ice makers, washing machines, dishwashers, refrigerator water dispensers, and on-demand water heaters may need special procedures.
Applying Too Much Air Pressure
High air pressure can damage lines, fittings, valves, and fixtures.
Leaving the Battery Connected
Small electrical loads can discharge the battery during storage.
Failing to Check the Roof
Winterizing the plumbing does not protect the RV from water entering through damaged roof or exterior seals.
Turning On an Empty Water Heater
An empty water heater can be damaged if its electric heating element or burner is activated.
Use a visible reminder until the system has been refilled in spring.
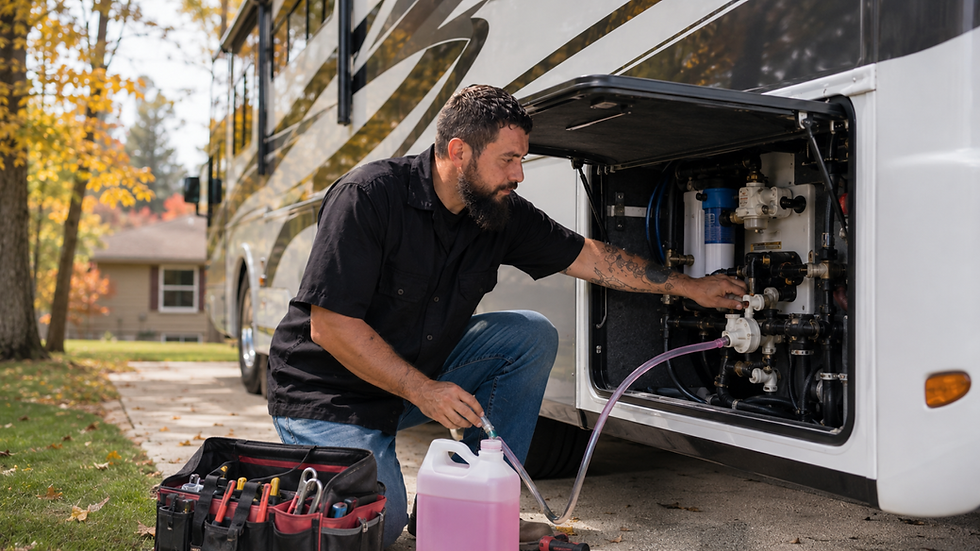
When Should You Call a Mobile RV Technician?
Professional winterization is recommended when:
You are unfamiliar with your RV’s plumbing layout
You cannot locate the bypass valves
The water heater will not drain
The low-point drains are difficult to identify
The RV has an ice maker or washing machine
You have an on-demand water heater
The plumbing system has existing leaks
The water pump is not working
You suspect electrical or battery problems
The roof or seals appear damaged
You are unsure whether all components are protected
Freezing weather is approaching quickly
A technician can also identify maintenance concerns while preparing the RV for storage.
Mobile RV Winterization in Petersburg, Ohio
J&S RV Service provides mobile RV repair, maintenance, winterization, and de-winterization for RV owners in Petersburg, Ohio and surrounding communities.
The company operates as a mobile service provider and lists a service radius of up to approximately 50 miles. Its stated service region includes Mahoning, Columbiana, Trumbull, Portage, and Lawrence counties.
Mobile service may be available at your:
Home
Campground
RV storage location
Other accessible parking location within the service area
Protect Your RV Before Freezing Weather Arrives
Avoid waiting until the first hard freeze to prepare your RV.
Call J&S RV Service at 330-398-4224 to request mobile RV winterization or discuss a cold-weather maintenance concern.
Frequently Asked Questions
At what temperature should I winterize my RV?
Winterize before temperatures are expected to remain at or below freezing. RV components, exterior plumbing lines, and storage compartments may become colder than the surrounding interior.
Can RV pipes freeze overnight?
Yes. Plumbing components can freeze during a sufficiently cold night, especially when the RV is unheated or exposed to wind.
How long does it take to winterize an RV?
The time required depends on the RV’s size, plumbing layout, water-heater type, appliances, and current condition. A simple system may take less time than an RV with multiple bathrooms, laundry equipment, an outdoor kitchen, or other specialty components.
How much RV antifreeze do I need?
The amount varies by RV. Smaller systems may require only a few gallons, while larger or more complex plumbing systems may require more. The water heater should generally be drained and bypassed to avoid unnecessarily filling it with antifreeze.
Can I pour RV antifreeze into the fresh-water tank?
Some manufacturers may permit it, but many systems are more efficiently winterized through the water pump’s antifreeze intake line. Follow the RV manufacturer’s instructions.
Do I need to winterize my RV if it is stored indoors?
Winterization may still be necessary if the storage facility is not reliably heated above freezing. Confirm the facility’s temperature controls and backup systems before relying on indoor storage alone.
Should I remove the RV battery for winter?
That depends on the battery type, storage environment, and available charging equipment. The battery should remain appropriately charged and protected according to its manufacturer’s instructions.
Does the RV water heater need antifreeze?
A traditional tank-style water heater is generally drained and bypassed rather than filled with antifreeze. On-demand systems may have different requirements.
Can I use compressed air instead of RV antifreeze?
Some RVs can be winterized using regulated compressed air, but pockets of water may remain in valves, pumps, appliances, and traps. Follow the manufacturer’s instructions and use RV antifreeze where required.
Can a mobile RV technician winterize my RV at a campground?
Mobile winterization may be available at a campground within the technician’s service area, subject to campground rules, site access, weather, and appointment availability.
Comments