How to Prepare Your RV for Camping Season: A Complete Checklist

Getting your RV ready for camping season involves more than checking the fuel level and loading your gear. A proper pre-season inspection helps identify electrical, plumbing, roof, battery, appliance, tire, and safety concerns before they interrupt your trip.
The direct answer: To prepare your RV for camping season, inspect the exterior and roof, check the tires and batteries, de-winterize the plumbing system, test the electrical system, operate the air conditioner and furnace, inspect the appliances, and verify that all safety equipment is working.
Use the following checklist to help prepare your motorhome, travel trailer, or camper for a safer and more comfortable season.
Why Is Pre-Season RV Maintenance Important?
An RV contains several interconnected systems that may sit unused for weeks or months. Temperature changes, moisture, storage conditions, battery discharge, pests, and normal wear can all affect how those systems perform.
A thorough inspection may help you:
Catch leaks before they cause more extensive damage
Identify weak or damaged batteries
Find plumbing issues before filling the water system
Confirm that heating and cooling systems work
Reduce the chance of appliance or electrical problems
Prepare your RV for safe travel and campground use
Pre-season maintenance is especially important after winter storage or an extended period without use.
Complete RV Camping Season Checklist
1. Inspect the RV Exterior
Start with a slow walk around the entire RV.
Look for:
Cracks or damage in exterior panels
Loose trim
Damaged seals
Broken lights
Missing vent covers
Signs of water intrusion
Damage around storage compartments
Evidence of pests or nesting
Pay close attention to areas where components pass through the roof or exterior walls.
These may include:
Roof vents
Air-conditioning units
Antennas
Skylights
Windows
Doors
Utility connections
Exterior lights
Small openings around seals can allow water to enter the RV over time.
2. Check the Roof and Seals
The RV roof is one of the most important areas to inspect before camping season.
Look for:
Cracked sealant
Loose seams
Soft spots
Tears or punctures
Standing water
Damaged vent covers
Separation around roof-mounted equipment
Stains or discoloration inside the RV
Do not walk on the roof unless the manufacturer confirms that it is designed to support foot traffic. Use an appropriate ladder and follow safe inspection practices.
When should you call a professional?
Contact an RV technician when you notice:
Soft roofing material
Active water intrusion
Extensive sealant failure
Damage around an air-conditioning unit
Interior ceiling stains
Uncertainty about the source of a leak
J&S RV Service offers mobile roof inspections and repair support as part of its RV service capabilities.
3. Inspect the Tires
RV tires can lose pressure or deteriorate even when the vehicle is not being driven.
Check:
Tire pressure
Sidewall cracks
Uneven wear
Bulges or cuts
Valve stems
Tread condition
Tire age
Spare tire condition
Inflate tires according to the RV or tire manufacturer’s recommendations. Do not rely only on visual appearance because an underinflated RV tire may not always look noticeably low.
For motorhomes, also check that the tire-pressure monitoring system is functioning when equipped.
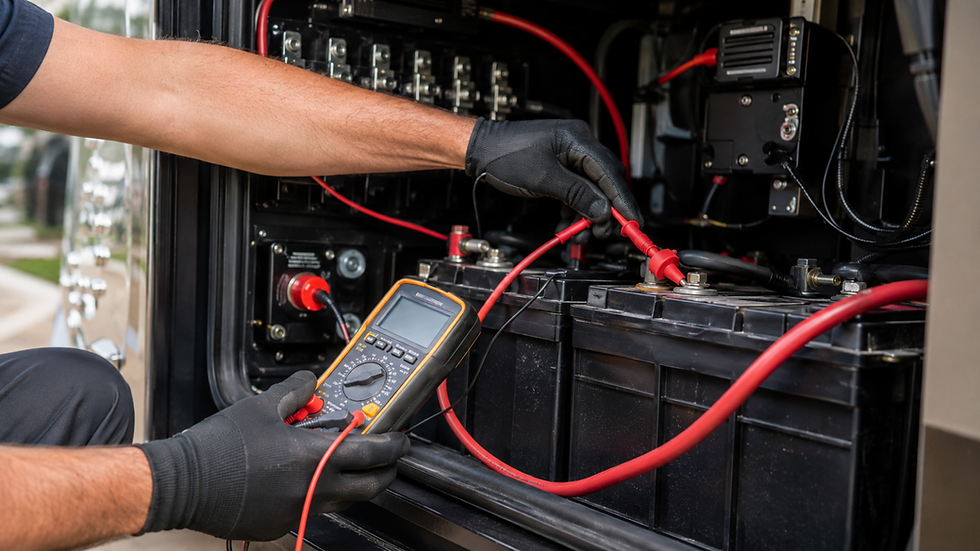
4. Test the RV Batteries
RV batteries may discharge during storage, especially when they remain connected to systems that draw small amounts of power.
Inspect the batteries for:
Loose terminals
Corrosion
Cracked or swollen cases
Damaged cables
Low charge
Signs of leaking
Unusual odors
Make sure the battery connections are secure and clean before testing the system.
Common signs of a battery problem
Interior lights are dim
Slides move slowly
Appliances fail to start
The battery does not hold a charge
The battery repeatedly dies
The RV has power only when connected to shore power
Battery and charging-system issues may involve the battery itself, converter, wiring, fuses, disconnect switch, or another electrical component.
J&S RV Service provides battery-system installation and repair as well as RV electrical diagnostics.
5. Inspect the Electrical System
Before testing appliances and equipment, confirm that the RV’s electrical system is operating correctly.
Check:
Shore-power cord
Plug condition
Surge protector
Circuit breakers
Fuses
Interior and exterior lights
Outlets
Battery disconnect switch
Converter operation
Generator, when equipped
Do not use a damaged power cord or plug. Discoloration, melted material, exposed wiring, or a burning smell should be evaluated before the RV is connected to power.
What can RV owners safely check?
Most owners can visually inspect cords, reset accessible breakers, check replaceable fuses, and confirm whether power is reaching the RV.
Testing internal wiring, converters, transfer switches, and high-voltage components should be left to someone with the appropriate experience.
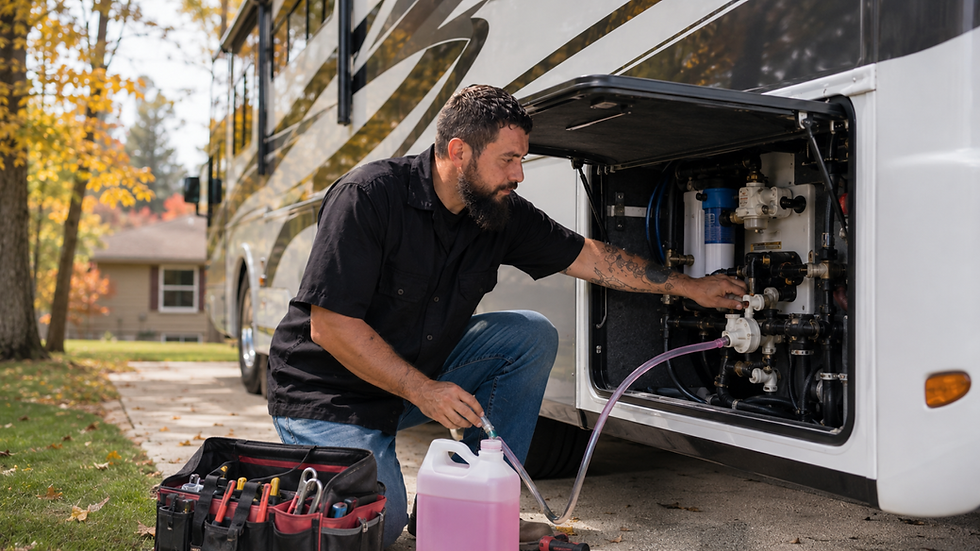
6. De-Winterize the Plumbing System
When an RV has been winterized, the plumbing system must be properly returned to normal operation before use.
The process may include:
Reconnecting components that were disconnected for storage
Returning the water-heater bypass valves to operating position
Filling the fresh-water tank
Flushing RV-safe antifreeze from the lines
Running water through each faucet
Flushing the toilet
Testing the water pump
Inspecting plumbing connections for leaks
Sanitizing the fresh-water system when appropriate
Follow the RV manufacturer’s instructions because plumbing layouts and winterization procedures vary.
Look for leaks around:
Faucets
Toilets
Water pumps
Shower connections
Low-point drains
Water heaters
Under-sink plumbing
Exterior water connections
Do not ignore small drips. Water may travel behind cabinets, walls, or flooring before it becomes visible.
7. Test the Water Heater
Once the plumbing system is filled and air has been removed from the lines, inspect the water heater.
Check:
Water connections
Drain plug or anode rod
Exterior access panel
Wiring
Ignition
Propane supply
Signs of corrosion
Water temperature
Leaks around the unit
Never operate an RV water heater when the tank is empty. Confirm that the unit contains water before turning on its heating source.
If the water heater fails to ignite, shuts off repeatedly, leaks, or does not produce hot water, professional diagnostics may be needed.
8. Test the RV Air Conditioner
Do not wait until the first hot trip of the year to discover that the air conditioner is not cooling.
Before testing it:
Connect the RV to an adequate power source
Inspect the filter
Check the thermostat
Confirm that vents are open
Remove visible debris around accessible exterior components
Listen for unusual noises
Allow the unit time to begin cooling.
Warning signs include:
Warm air from the vents
Weak airflow
Frequent cycling
Frozen coils
Water entering the RV
Burning smells
Breakers repeatedly tripping
Loud or unusual sounds
J&S RV Service includes air-conditioner repair among its mobile RV services.
9. Test the Furnace
Even during warmer camping months, nighttime temperatures can fall unexpectedly.
Test the furnace and check for:
Proper ignition
Warm airflow
Unusual smells
Weak airflow
Repeated shutdowns
Unusual noises
Error codes
Make sure interior and exterior vents are unobstructed.
A mild dusty smell may occur when a furnace is first used after storage, but a strong propane, electrical, or burning odor should be taken seriously. Turn the system off and seek professional assistance.
10. Inspect RV Appliances
Test each appliance using the appropriate power source.
Depending on the RV, this may include:
Refrigerator
Microwave
Stove
Oven
Water heater
Furnace
Air conditioner
Television
Washer and dryer
Vent fans
Range hood
Some RV refrigerators can operate using more than one energy source. Test each approved operating mode according to the manufacturer’s instructions.
If several appliances stop working simultaneously, the issue may involve the power supply, battery voltage, propane system, converter, breaker, fuse, or wiring rather than several separate appliance failures.
11. Test Slide-Outs, Awnings and Moving Components
Operate slide-outs and awnings before leaving for a trip.
Watch for:
Uneven movement
Grinding or clicking
Slow operation
Damaged seals
Obstructions
Sagging fabric
Water pooling
Frayed wiring
Hydraulic leaks
Remove debris around slide seals and inspect for cracking or separation.
Do not continue operating a component that is binding, moving unevenly, or making abnormal sounds. Continued use may worsen the damage.
12. Inspect Propane Components
Propane systems require careful handling.
Check:
Tank condition
Regulator
Hoses
Connections
Detector operation
Appliance ignition
Exterior vents
Never use an open flame to search for a propane leak.
Leave the area and contact a qualified professional if you smell propane or suspect a leak. Avoid switching electrical devices on or off near a suspected leak.
13. Test Safety Equipment
Verify that the RV’s safety equipment is installed, accessible, and functioning.
Check:
Smoke alarms
Carbon-monoxide detectors
Propane detectors
Fire extinguishers
Emergency exits
First-aid supplies
Flashlights
Roadside warning devices
Replace batteries and expired equipment when necessary.
Confirm that all travelers know where emergency exits and fire extinguishers are located.
14. Inspect Interior Areas for Moisture and Pests
Open cabinets, closets, storage compartments, and access panels.
Look for:
Water stains
Soft flooring
Discoloration
Mold-like growth
Musty odors
Droppings
Nesting material
Damaged wiring
Chewed insulation
Insect activity
Pests can damage wiring, insulation, hoses, and stored materials. Moisture may also remain hidden behind furniture or cabinets.
15. Check Essential Travel and Campsite Equipment
Before departure, confirm that the RV has the necessary equipment for travel and setup.
Suggested items include:
Wheel chocks
Leveling equipment
Drinking-water hose
Water-pressure regulator
Sewer hose and fittings
Electrical adapters
Surge protector
Tire-pressure gauge
Basic tools
Spare fuses
Flashlight
Extension cords approved for RV use
Emergency supplies
Also confirm that hoses, cords, and adapters are compatible with the campground or destination.
What Should You Do Yourself, and When Should You Call an RV Technician?
Many RV owners can safely perform visual inspections, basic cleaning, filter replacement, detector testing, and manufacturer-approved maintenance.
Professional help is recommended when:
Electrical testing is required
A breaker repeatedly trips
You smell propane
Water is entering the roof or walls
A slide-out moves unevenly
An appliance repeatedly fails
The battery will not charge
The air conditioner is not cooling
The furnace does not ignite
You find soft flooring or structural damage
You are unsure how to de-winterize a system safely
Trying to repair a complex electrical, propane, roof, or appliance problem without the right experience can increase damage or create a safety risk.
Mobile RV Maintenance in Petersburg, Ohio
J&S RV Service provides mobile RV repair, diagnostics, and preventative maintenance from its base in Petersburg, Ohio. Services include RV electrical and plumbing repair, water heaters, furnaces, air conditioners, slide-outs, roofs, appliances, batteries, winterization, de-winterization, and preventative maintenance. The business serves customers within approximately 50 miles across its stated service region.
Instead of transporting your RV to a traditional shop, mobile service may be available at your home, campground, or storage location.
Need Help Preparing Your RV?
Get expert mobile RV service right where you need it.
Call J&S RV Service at 330-398-4224 to request an appointment or discuss an RV maintenance concern.
Frequently Asked Questions
How early should I prepare my RV for camping season?
Ideally, inspect and test your RV at least two to four weeks before your first planned trip. This provides time to order parts, schedule repairs, and correct problems without delaying your departure.
What should I check after my RV has been stored for winter?
Check the roof, exterior seals, tires, batteries, plumbing, electrical system, appliances, air conditioner, furnace, propane components, safety detectors, and interior areas for moisture or pest damage.
Can I de-winterize my RV myself?
Some RV owners can de-winterize their units by following the manufacturer’s instructions. Professional service may be appropriate when you are unfamiliar with the plumbing layout, find leaks, or are unsure about the water-heater bypass system.
Should I inspect my RV roof every year?
Yes. Routine roof and seal inspections can help identify cracks, separation, punctures, and moisture concerns before they cause more extensive damage. Inspection frequency may vary based on the roof material, storage conditions, and manufacturer recommendations.
Why is my RV battery dead after storage?
Possible causes include normal discharge, parasitic power draws, poor connections, cold temperatures, an aging battery, or a charging-system issue. A battery that will not hold a charge should be tested.
How do I know whether my RV has a water leak?
Common signs include stains, soft flooring, bubbling wall material, musty odors, damp cabinets, dripping connections, or unexplained water-pump cycling.
Can a mobile RV technician service my RV at a campground?
Mobile service may be available at campgrounds within the provider’s service area. Confirm the campground’s rules and provide the technician with your site number, RV type, and access instructions.
What information should I provide when requesting service?
Provide the RV’s year, make, model, current location, and a clear description of the problem. Photos, videos, warning lights, and error codes may also help with the initial assessment.
Comments